Pages

Friday, December 21, 2012

Red and White Christmas!

Since we are only days away from Christmas, I wanted to share a few of our decorations to inspire you! This year I chose to do a red and white color scheme. 
 
This is above the TV entertainment center. I like to pull things from around the house such as these white birdcages, and add Christmas decor to them. You can save a lot if you just shop your house first!


On the mantle I had known since October or so that I wanted to reuse the cardboard craft letters that I used for my son's first birthday. I had an O, N, and an E. I decided to buy an L and use a twig wreath for the O. I bought the twig wreath at the dollar store and I already had the empty wood frame. I covered the letters with Christmas scrapbook paper and hung the wreath from the frame with ribbon! It all only cost about $5!!
 

I tend to use this garland with white lights every year. I just love how full it makes the mantle look and it compliments whatever your Christmas decor is for the season!

I also filled a glass jar I had from another room with pine cones, white ornaments, and plastic red rubies.

These small greenery wreaths were another dollar store find. I had 3 of them and planned on using them on our dining table until I was on the ladder decorating our tree and decided to hang them with the left over ribbon from our curtain rod.

This picture doesn't show it too well, but they are so cute!

And of course, I had to share a photo with the lights lit. The tree just looks so much prettier with the lights on!
 
I hope everyone has a very Merry Christmas and a Happy New Year!!
Looking forward to what is in store for Style with Wisdom next year!


Thursday, December 6, 2012

Custom Kids Room Name Signs!

  Now that we know we are having another boy, I have been searching the web for kids room door signs. Our two kids rooms are literally right next to each other and I thought it would be cute to hang each of their names on their own door.
I was really disappointed in what was available for purchase! As most of you know, I am not really into the "corny" baby stuff and most of what I found was just that. Everything had animals, silly fonts, bold colors, etc.
So what does a determined, crafty girl do? Yep, make it herself! I found these small cardboard letters at Hobby Lobby, covered them in scrapbook paper, and glued them together! Once they were done, I used double sided 3M removeable stickers to adhere them to the doors!
I am so happy with the way they turned out and I have had such great feedback from family and friends that I am now offering them in my Etsy store for purchase! Up to 8 letters is only $20!


Since we haven't formally announced baby #2's name yet, here it is!

 
I hope you feel inspired by this DIY project!


Thursday, November 8, 2012

Master Bath Upgrade!

 I know I mentioned that after we finished the master bedroom, we were moving on to the master bath, and we did...but although we finished the big things, it has taken forever to find those perfect smaller pieces to finish off the space. I finally feel like its finished and ready to show you pics and share some awesome tips!!
 
The first thing we did is paint the bathroom to match the bedroom. I always think its best to treat your master suite as one cohesive space. The color is Porpoise by Behr.
I found some beautiful cream print fabric and made some short curtains to sit over the bath.

I found this apothecary sign on clearance at garden ridge and I loved the rustic look. I paired it with 3 capese shell mirrors for a more beachy, classy look. The decorative hand towels are from Anthropology and probably cost more than most items in the bathroom, but they were so perfect I couldn't pass them up. Each room in your home should have something special that makes you feel good.

Candle holders don't always have to hold candles! You can put anything on them. In this case I found these shell balls to place on top of the crystal bases.

We changed out the lighting since our builder put in those horrible beauty bar lights. I chose these inexpensive black fixtures from Lowes. They were about $50 and let me give you an invaluable tip!!!! You can change your lighting out yourself and save yourself TONS of money!! You do not need to hire an electrician and pay upwards of $75 an hour! That's more than my light cost! Just turn off the breaker to that light and follow the instructions that come with the fixture. Normally its as simple as red wire to red wire, white to white, and ground wire (copper) to ground screw. I promise, its so easy!! I did these myself!

The vanities are what we chose when we built the house, so they had to stay as is. Same with the counter tops. And since our mirrors were so big, we decided to add framing to them instead of ripping them down. We bought molding with a small detail on one side, mitered the corners, and used heavy duty mirror adhesive to glue them to the front of the mirror. I then painted them white and we LOVE them! You can do this project for as little as $30!
Tip: There is no rule that says all of your metals have to match...you will see we have brushed nickel, black, and brown.

I bought these frames at the dollar store and found black coral images online. I printed them at home on cardstock and put them in the frames! Voila, $2 art! We removed the towel rings and replaced them with these hooks ($2 ea. at Hobby Lobby).

This is the hubby's side...same thing, just smaller lol.

We removed the towel rack and added this beautiful wrought iron piece from Hobby Lobby ($20). It has towel storage on top and hanging storage below. I love it! I also printed photos of Seaside Beach from one of our recent WA/OR trips and had them printed and wrapped them on canvas!

This is the back wall of the toilet room. Really a room that no one sees but the hubby and I, but it needed something! I added shelves I had stashed in a closet (The Christmas Tree Shops, $5ea). I added a basket for toilet paper storage, some flowers, jars for q-tips and cotton balls, and a larger basket to hold those private/feminine items.

I literally shopped the kitchen section at Target for my under sink organization. This is a wooden plate rack I used to hold all bottles and daily use items. Try walking every ilse in a store like Target and reimagining items for different uses! It can be so much fun!

I bought a wine rack to hold my irons. Since I have 1 straightening iron, and 3 different sized curling irons, I needed something to hold everything! And I love how well this works!

Here is a further back shot from the bedroom looking in.

I found this 5x7 rug at Garden Ridge for $40. I wanted to do a full rug instead of 2 smaller ones in front of each vanity (which is a typical bathroom design). My son is always playing in the bathroom while I get ready and I wanted a soft space for him to play!
 
Ok, so there you have it! I hope you got lots of DIY and inspirational ideas! My main reason for posting about my personal and work projects is to give you all the free advice I can, so I hope I helped someone out there!
We have since moved on to the master closet and I just have one more finishing touch until I can say its finished too! Stay tuned...
 

Wednesday, October 24, 2012

Transitioning from Boy to Girl!

Recently a client and good friend of mine asked if I could make some changes to her baby bedding. The bumper and blanket were made for her now 1 1/2 year old son and she is now expecting a baby girl! The bedding was in great condition and it was white. The only problem was the piping trim was grey, so we decided to add a cute peach ruffle to give it new life for the new baby!
 
I know you guys have heard me say time and time again, 'if it is in good condition or has good bones, make the necessary changes to make it work in your home'! The same goes for this type of project. There was nothing wrong with the bedding and a lot of work goes into making custom baby bedding, so getting rid of this one and starting from scratch just seemed silly!
 
I removed the grey piping and inserted a peach ruffle along all of the edges! It has a very sweet, girly feel to it now!  


Wednesday, October 17, 2012

Harvest Time!

  Fall is one of my favorite times of the year! When Texas finally starts to cool down, I can break out my fall boots, sip hot lattes on the couch in the mornings, and decorate my mantle with fall decor!
That's exactly what I want to share with you today! For those of you who know me well, know that I can't stand Halloween and we do not celebrate it here in my family, so I tend to participate in Fall Harvest instead!
A friend of mine and I were recently inspired by a photo we saw on Pinterest, so we decided to have a craft day and make our own version! Now trying to do a cut, paint, iron, glue, etc. type craft while we had 2 little ones under 17 months running around may not have been the best plan, lol, but we did it!
 
Here is the finished product!
 
 
I love the fall trend this year of using lots of white and then small pops of color! I bought the empty wood frame at Hobby Lobby for $15. We used linen scraps to cut out the flags and then glued them to a strand of jute. The pumpkins are from the dollar store! They were orange styrofoam, so we just spray painted them white and then used a stencil to paint on the letters. Overall the project only cost about $20! The white candle sticks I already had, so I added them for balance on the mantle and topped them with brown wicker pumpkins!
 
 
This is the Pinterest photo we were inspired by from A Diamond in the Stuff!
 
 
I also added little vases around the house filled with pine cones and small pumpkins.
 

It's so easy to fill a clear vase and wrap the base with garland!
 
I hope you are inspired by one of these projects just like I was! Having these things in my home make it feel so warm and cozy for fall!


Friday, October 5, 2012

Grey and Yellow Nursery

 Hey everybody! I know its been a few weeks since my last post and I apologize! Life has been very hectic lately around here! I have been working on so many things around the house as well as new client projects. We are also expecting our second baby so I have been pretty sick, but feeling much more like myself now!
I have some projects I am just completing and will be taking photos of to share with you soon, but since I have baby on the brain, I thought I would share my first born's nursery with you today! I designed his nursery before I started this blog last November and it seems that the grey and yellow color scheme is very popular now, so hopefully it will inspire you! Not to mention when I posted this post on the vintage baseball nursery I designed for a client, it took the top spot for most views on my blog at 805 views in only 4 months!
 
We painted the walls grey and used lots of white, yellow, and black accents. The drum shade pendant light was custom made at lamps.com to match the quatrefoil pattern in the fabrics.

I think it is so important to personalize every room in your home with photos, so we added 3 of our maternity photos in the nursery. The chair was custom made to match our color scheme with white fabric and grey piping trim.

We used an Ikea bookcase and yellow bins to store toys and books.

I almost always replace the knobs that come on any piece of furniture, so for this dresser I added round yellow knobs to match the room. It is also important when designing a space to add shape repetition throughout the room. You will see we have a round yellow side table, round yellow candles, round yellow knobs, and round yellow rugs. This helps to draw your eye around the room.

This beautiful photo was taken by a professional photographer that was sent to take photos of our home for an online company. Of course it was once we had already lowered the crib for our now toddler, so the room doesn't look as well put together as it did when he was still in my belly :)

For the curtain, I used a white textured fabric and added the grey quatrefoil trim along the edge.

For more personalization, we added black and white vintage photos of my husband's grandpa's playing sports back in their day!

I could not find a bumper that I liked, so I made this one myself. Incorporating modern yellow and grey fabrics. Of course, when I was designing this room, there were no good yellow and grey fabrics to be found! Today they are everywhere!
 

I wanted a way to divide the clothing in the closet, so I scrapbooked these size sorters to match the room!
 

Last but not least, we customized the closet to maximize storage and hanging space. This was just a simple kit from Lowes. We removed the single bar and added these pieces.
 
 
Just looking through these photos again makes me so excited to design our new baby's nursery! I already have so many ideas in mind, but we have to wait about 2 more weeks to find out what this little one is! Can't wait!


Friday, September 7, 2012

A Little Pinterest Food Inspiration...

 Hey guys! This week I wanted to share with you all of the recipes I have been trying from Pinterest over the last few months! I am always trying new dinner recipes and I wish there was a little "rate this recipe" spot on Pinterest so you could know right away if it was worth making or not! So this is the closest thing I can think to do...I am posting the photo and recipe link here along with my review of the recipe! I hope you love these as much as my family did!
 
 
This is a great side bread recipe!! I love any recipe with artichokes!!
 
This was so yummy! Such a fantastic way to get your family to eat vegetables! We all have a hard time eating our veggies around here and we all LOVED this recipe! And the left overs were great the next day for lunch!
 
Let's just say not only can John Legend sing, but he can make some awesome Mac and Cheese! I have tried so many 'adult' mac and cheese recipes and most all have been good, but this one was superb! I would make this one again for sure!
 
I have a huge sweet tooth, so I am always baking something and these had only 5 ingredients! They were so yummy!!
 
Ok I will say this was really good, and even my husband liked it and he is not a huge fan of soups, but I didn't think it was identical to Olive Garden. It was still a good recipe though!
 
Crock Pot Chicken
This Pin did not link back to the recipe, but had it listed below the photo so here it is...crock pot recipe. Chicken in the bottom. Pour one cup of broth over top. Mix soup and stuffing with 1/2 cup of water and pour on top of chicken. Cook on low for 6 hrs.
This was soooo GOOD! It reminded me of Thanksgiving. Such a good comfort food meal! And so easy! If you people are not cooking with your crockpot at least once a week, you are missing out on the best food you've ever had and the easiest meals ever!!!
 
Another awesome recipe, but they claim to be just like PF Changs and to me, they are not...but still very yummy!
 
Great way to do chicken and then add it to a tortilla!
 
This recipe again claims to be like the original, I didn't think it was, but we all agreed it was WAY better!! Such a good and easy recipe!
 
This really was the best white chicken enchilada recipes I've tried! My hubby went nuts over these!
 
I don't know about you, but I love breakfast style food for dinner and this was a winner!!
 
These were amazing! I definitely should have doubled the recipe because they went so fast!!
 
Do I really even need to tell you if this was good? I mean just look at the photo...drool...
 
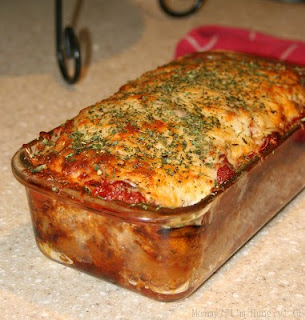
This is an Italian version of meatloaf and it was such a good change from your basic meatloaf! We loved it!
 
This was soooooo good that I made I've made it twice already!!
 
I am not a big meat eater, but this meat dish was incredible!
 
This isn't an actual recipe, but it is probably the BEST cooking tip I have gotten in years! Whenever you want perfectly shredded chicken, just toss it in your mixer with the paddle blade, put it on low for a minute, and voila! Whether you cook the chicken in the crockpot with sauces and seasonings, or just boil it, you can always use this method! No more shredding chicken by hand!!
 
 
Ok so I know there are a lot of recipes here, but these are all seriously worth making! I just wanted to give props to all the  bloggers and chefs out there who were gracious enough to share the recipes on Pinterest! Oh, and if you're not on Pinterest yet, GET WITH IT! Not only is it full of great recipes, but it has interior design inspiration, tips for kids, fashion, you name it! I hope you enjoy these recipes and I would love to hear your feedback!!